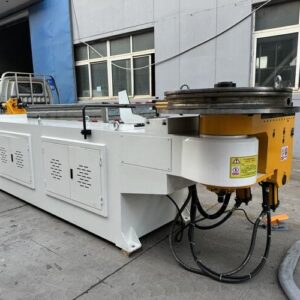
Understanding the Basics of Pipe Bending
Use a pipe bender The perfect bend requires not just the right tools, but also proper technique and understanding of material properties. Whether you’re working with electrical conduit, plumbing pipes, or structural tubing, the fundamental principles remain similar.
Types of Pipe Benders You Might Encounter
Manual Pipe Benders
- Hand-operated mechanical benders
- Hydraulic hand pumps
- Roll-type benders
Power Pipe Benders
- Electric hydraulic benders
- Pneumatic benders
- CNC pipe bending machines
Essential Preparation Steps Before Bending
Material Assessment
Before starting the bending process, examine your pipe carefully. Look for any signs of damage, rust, or irregularities that might affect the bend quality. The pipe’s material composition will significantly influence the bending approach – copper, steel, and aluminum all behave differently under stress.
Measuring and Marking
Precision is key in pipe bending. Use these steps for accurate measurements:
- Determine the desired angle of the bend
- Mark the bend start point clearly
- Calculate the bend allowance
- Add reference marks for alignment
Step-by-Step Guide to Using a Pipe Bender
1. Setting Up Your Pipe Bender
- Choose the appropriate die size for your pipe
- Ensure the bender is properly secured
- Verify all safety mechanisms are in place
- Lubricate moving parts if necessary
2. Positioning the Pipe
- Insert the pipe into the bender
- Align your marked point with the center line of the die
- Secure the pipe firmly in the bender’s groove
- Double-check all measurements before proceeding
3. Executing the Bend
- Apply steady, consistent pressure
- Monitor the angle indicator
- Maintain proper pipe alignment
- Stop at regular intervals to check progress
4. Making Adjustments
- Check for spring-back
- Compensate for material memory
- Make minor corrections as needed
- Verify bend angle accuracy

Advanced Techniques for Perfect Bends
Managing Spring-Back
One often overlooked aspect of pipe bending is spring-back – the tendency of the material to partially return to its original shape after bending. To compensate:
- Overbend slightly (typically 2-3 degrees)
- Use gradual pressure rather than sudden force
- Consider material-specific spring-back characteristics
Multiple Bend Coordination
When creating complex shapes requiring multiple bends:
- Plan your sequence carefully
- Account for accumulated tolerances
- Mark all bend points before starting
- Use reference points for maintaining orientation
Common Mistakes to Avoid
Pressure-Related Issues
- Applying too much force too quickly
- Inconsistent pressure application
- Failing to account for material strength
Alignment Problems
- Incorrect die selection
- Poor initial pipe positioning
- Inadequate securing of the pipe
Maintenance and Care of Your Pipe Bender
Regular Maintenance
- Clean after each use
- Inspect for wear and damage
- Lubricate moving parts
- Store in a dry environment
Troubleshooting Common Issues
- Address unusual noises immediately
- Check for loose components
- Verify calibration regularly
- Replace worn parts promptly
Safety Considerations
Personal Protection
- Wear appropriate safety gear
- Use proper lifting techniques
- Maintain stable footing
- Keep hands away from pinch points
Equipment Safety
- Inspect tools before use
- Verify capacity ratings
- Ensure proper grounding for electric models
- Maintain clear work area
Special Considerations for Different Materials
Working with Copper
- Use appropriate bending radius
- Avoid kinking
- Consider annealing when necessary
- Monitor wall thickness
Steel Pipe Considerations
- Account for greater force requirements
- Use proper lubrication
- Monitor heat build-up
- Choose appropriate die materials
Professional Tips for Optimal Results
- Keep a bending log for complex projects
- Create templates for repeated bends
- Invest in quality measurement tools
- Practice on scrap material first


