How to DIY Exhaust Pipe Bender
Introduction: The Importance of an Exhaust Pipe Bender
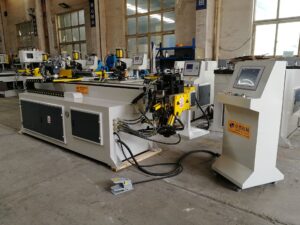
When it comes to customizing or repairing exhaust systems, having the right tools can make all the difference. One such essential tool is the exhaust pipe bender.

Why Build Your Own Exhaust Pipe Bender?
Building your own exhaust pipe bender offers several advantages over purchasing a commercial one. First, it allows you to tailor the tool to your specific needs,
ensuring that it fits perfectly into your workspace and handles the types of bends you frequently require. Second, it can be significantly more cost-effective, especially if you already have access to basic metalworking tools. Finally, the satisfaction of building something with your own hands is immeasurable, and it can serve as a valuable learning experience that enhances your mechanical skills.
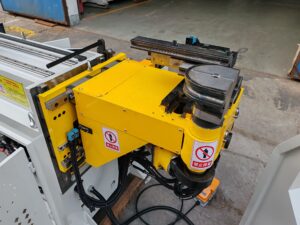
Before diving into the construction process, it’s important to understand the fundamentals of exhaust pipe bending. An exhaust pipe bender is a tool designed to shape metal pipes into smooth, consistent curves without damaging the material. ust Pipes
Exhaust pipes come in various materials, each with its own properties and challenges when it comes to bending. The most common materials include:
- Steel:
- This is the most widely used material for exhaust pipes due to its durability and affordability. However, steel can be challenging to bend without the right equipment, as it tends to develop kinks if not handled properly.
- Stainless Steel:
- Stainless steel is more resistant to corrosion and heat, making it a popular choice for high-performance vehicles. It is also easier to bend than regular steel, but it requires more precise control to avoid thinning the walls of the pipe.
- Aluminum:
- Aluminum is lightweight and less prone to rust, but it is softer than steel and can be more difficult to work with. It requires special care to prevent cracking or splitting during the bending process.
Common Bends in Exhaust Systems
Exhaust systems often require a variety of bends to fit around engine components, frame rails, and other obstacles. Some of the most common bends include:
- 90-Degree Bends:
- These are used to make sharp turns in the exhaust system, such as when routing the pipe around the engine block or frame.
- 45-Degree Bends:
- These are less severe than 90-degree bends and are often used to create smoother transitions between sections of the exhaust system.
- S-Bends:
- S-bends are used to create a series of back-to-back curves, which can help reduce exhaust noise and improve airflow.
- J-Bends:
- J-bends are used to route the exhaust pipe upward or downward, often at the rear of the vehicle where the pipe exits the chassis.
Materials and Tools You’ll Need
To build your own exhaust pipe bender, you’ll need a few key materials and tools. While some of these items may already be available in your workshop, others may require a trip to the hardware store or a specialized supplier. Here’s a list of what you’ll need:
Materials
- Steel Plate (1/2″ Thick): This will serve as the base of your exhaust pipe bender. The size of the plate will depend on the type of bends you plan to make, but a 12″ x 18″ plate should be sufficient for most applications.
- Steel Rods (1″ Diameter): These rods will act as the mandrels, which are inserted into the exhaust pipe to prevent kinking during the bending process. You’ll need at least two rods, one for each end of the pipe.
- Bolts and Nuts (1/2″ Thread): These will be used to secure the mandrels to the base plate. Make sure to choose bolts that are long enough to pass through the plate and rod, with enough room for adjustment.
- Welding Rods: If you plan to weld the components together, you’ll need welding rods that are compatible with the materials you’re using. Stick welding is typically the best option for this project.
- Lubricant (Optional): Applying a lubricant to the mandrels can help reduce friction and make the bending process smoother. WD-40 or a similar product works well for this purpose.
Tools
Angle Grinder:
This tool will be used to cut and shape the steel plate and rods. Make sure to use a cutting wheel designed for metal to avoid overheating the material.
Welding Machine:
A stick welder or MIG welder is ideal for joining the components of your exhaust pipe bender. If you don’t have access to a welding machine, you can also use bolts and nuts to assemble the tool.
Drill Press:
A drill press will be used to create holes in the base plate for the mandrels. Make sure to use a drill bit that matches the diameter of the steel rods.
Vise:
A sturdy vise will help hold the exhaust pipe in place while you apply pressure to bend it. Look for a vise with adjustable jaws that can accommodate different pipe diameters.
C-clamps:
C-clamps can be used to secure the exhaust pipe bender to a workbench or other stable surface, ensuring that it doesn’t move during use.
Measuring Tape and Square:
Accurate measurements are crucial when building an exhaust pipe bender. A measuring tape and square will help you ensure that the components are aligned correctly and that the bends are uniform.
- Safety Gear:Always wear appropriate safety gear, including gloves, safety glasses, and ear protection, when working with power tools and metal.
Step-by-Step Instructions for Building Your Exhaust Pipe Bender
Now that you have all the necessary materials and tools, it’s time to start building your exhaust pipe bender. Follow these step-by-step instructions to create a functional and reliable tool that will serve you well in your exhaust system projects.
Step 1: Prepare the Base Plate
The first step is to prepare the base plate, which will serve as the foundation of your exhaust pipe bender. Using an angle grinder, cut the steel plate to the desired size. For most applications, a 12″ x 18″ plate should be sufficient, but you can adjust the dimensions based on your specific needs.
Once the plate is cut to size, use a drill press to create two holes near the edges of the plate. These holes will be used to secure the mandrels. The diameter of the holes should match the diameter of the steel rods (1″ in this case). Make sure the holes are evenly spaced and aligned with each other to ensure that the mandrels are parallel when installed.
Step 2: Attach the Mandrels
Next, insert the steel rods into the holes in the base plate. Use bolts and nuts to secure the rods in place, making sure they are tight but still allow for some adjustment.
The mandrels should be positioned so that they are parallel to each other and extend beyond the edges of the plate by at least 6 inches. This will give you enough room to insert the exhaust pipe and apply pressure to bend it.
If you have access to a welding machine, you can weld the mandrels directly to the base plate for added stability. However, using bolts and nuts allows for easier adjustments and repairs if needed.
Step 3: Add a Pivot Point
To create smooth, consistent bends, you’ll need to add a pivot point to your exhaust pipe bender. This can be done by welding a small piece of steel to the center of the base plate,
perpendicular to the mandrels.
The pivot point should be about 2 inches tall and wide enough to support the exhaust pipe as it is being bent.
Alternatively, you can use a bolt and nut to create a removable pivot point. This allows you to adjust the position of the pivot point depending on the type of bend you want to make.
For example, moving the pivot point closer to one end of the mandrels will result in a tighter bend,
while moving it farther away will create a more gradual curve.
Step 4: Test the Bending Process
Before using your exhaust pipe bender on an actual exhaust system,
it’s a good idea to test the bending process with a scrap piece of pipe.or your hands,
gradually increasing the force until the pipe begins to bend.
Pay attention to how the pipe behaves during the bending process. If you notice any kinks or weak spots.
adjust the position of the mandrels or pivot point to achieve a smoother bend. You may also want to apply a lubricant to the mandrels to reduce friction and make the bending process easier.
More details are available with one click


