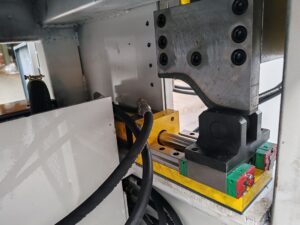
How do you bend a pipe with a copper pipe bender?
A Comprehensive Guide
In the world of plumbing and HVAC, the ability to bend pipes is not just a skill—it’s an art form. Whether you’re a seasoned professional or an eager DIY enthusiast, mastering the use of a copper pipe bender can elevate your projects to new heights. This article delves into the nuances of bending copper pipes, ensuring you have the knowledge and confidence to tackle any piping challenge.

Understanding the Copper Pipe Bender
Before diving into the bending process, it’s crucial to understand the tool at the heart of this task: the copper pipe bender. This specialized tool is designed to bend copper pipes without causing kinks or cracks, maintaining the integrity and flow capacity of the pipe. A copper pipe bender typically consists of a base, a bending shoe, and a jaw.
Key Components of a Copper Pipe Bender
- Bending Shoe: This is the part that comes into direct contact with the pipe. It ensures a smooth bend and prevents the pipe from collapsing.
- Bending Jaw: This holds the pipe in place and allows for precise control over the bending angle.
- Base and Frame: These provide stability and support during the bending process.
Preparing for the Bend
Selecting the Right Pipe
Before you even touch the bender, ensure you have the right type of copper pipe. Soft copper pipes are ideal for bending due to their malleability. Measure and cut your pipe to the desired length, allowing a little extra for adjustments.
Marking the Bend Line
Accurate marking is crucial. Use a permanent marker to draw a line on the pipe where you intend to bend. This line serves as a guide, ensuring precision and consistency in your bends.
The Bending Process
Setting Up the Bender
Place the copper pipe bender on a stable, flat surface. Ensure the bending shoe is aligned with the mark on your pipe. Adjust the jaw to fit snugly around the pipe, providing support without squeezing it too tightly.
Securing the Pipe
Position the pipe within the jaw, ensuring the mark aligns with the bending shoe. Secure the pipe firmly, but be careful not to over-tighten, as this can cause damage.
Executing the Bend
Gently push the handle of the bender forward, applying steady pressure. The bending shoe will guide the pipe into a smooth curve. It’s important to apply consistent pressure to avoid kinks or bends that are too sharp.
Checking the Angle
After completing the bend, check the angle with a protractor or an angle gauge. Adjust as necessary by repeating the process with slight modifications.
Tips for Perfect Bends
- Practice Makes Perfect: Before working on your actual project, practice on scrap pieces of copper pipe. This will help you get a feel for the tool and the bending process.
- Heat the Pipe: For tighter bends, consider heating the pipe with a heat gun. This makes the copper more pliable and reduces the risk of cracking.
- Use Lubrication: Applying a small amount of soap or a specialized lubricant to the pipe can help achieve smoother bends.
Common Mistakes to Avoid
- Over-Tightening the Jaw: This can damage the pipe and affect the bend.
- Inconsistent Pressure: Apply steady pressure throughout the bending process to avoid uneven bends.
- Skipping the Marking Step: Failing to mark the bend line can result in inaccurate bends.
Advanced Bending Techniques
Creating Complex Shapes
For more intricate designs, such as elbows or custom fittings, additional tools like a miter box or a spring may be required. These tools help achieve precise angles and shapes.
Using a Spring Bender
A spring bender can be used for more complex bends. The spring allows for tighter bends without flattening the pipe. This tool is particularly useful for creating 90-degree angles.
Maintenance and Care
Proper maintenance of your copper pipe bender is essential for its longevity and performance. Regularly clean the tool to remove debris and check for any signs of wear or damage. Lubricate moving parts to ensure smooth operation.
More details are available with one click


